The Complete Guide to Pottery Fundamentals & Clay Working
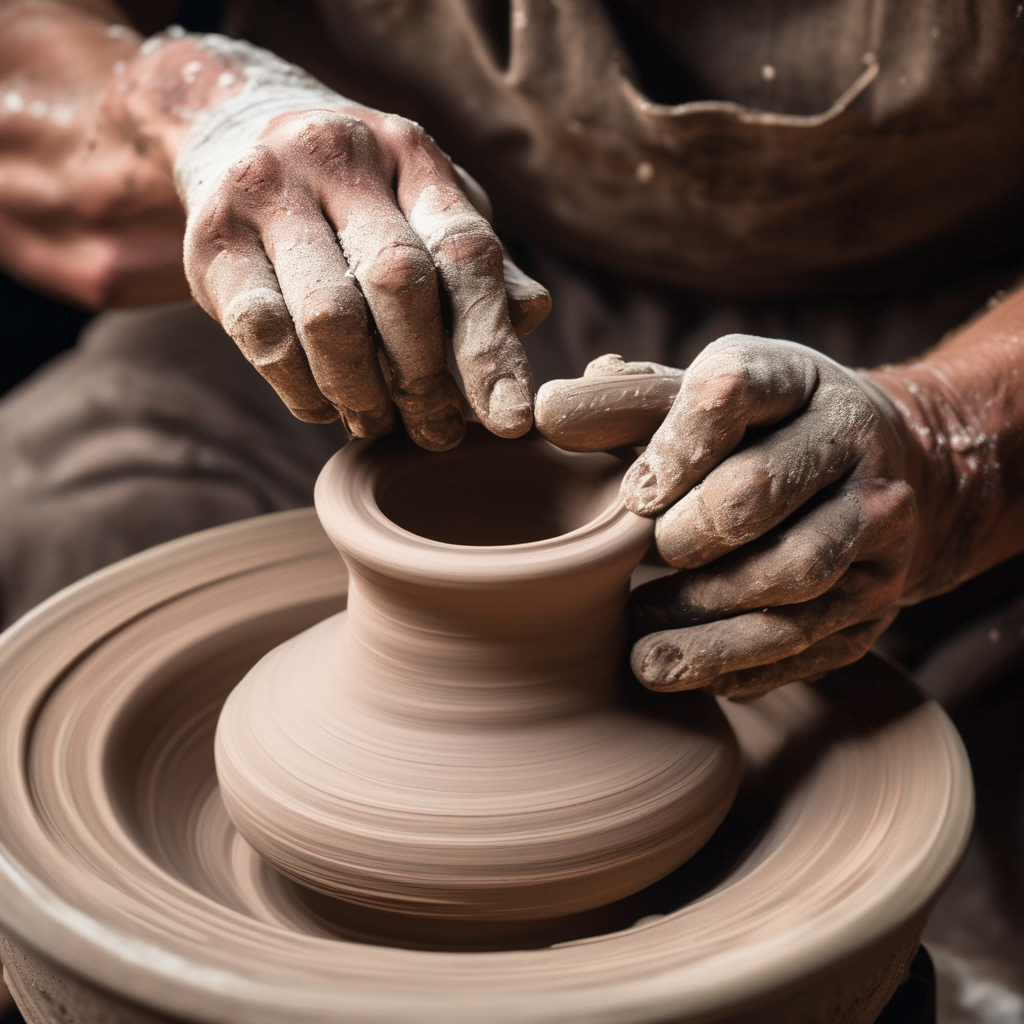
Table of Contents
Introduction to Pottery Fundamentals
The ancient art of pottery represents one of humanity's oldest and most enduring creative expressions. As master ceramicist Ria Harman often tells her students at Cornwall Clay Craft, pottery is simultaneously a meditative practice, a technical skill, and a gateway to artistic expression that connects us to thousands of years of human creativity.
This comprehensive guide, developed through collaboration between our master potter James and ceramics expert Ria Harman, draws from decades of combined experience in traditional and contemporary pottery techniques. According to the Ceramic Arts Network, mastering fundamental pottery techniques provides the foundation for all advanced ceramic arts.
Whether you're drawn to the centered calm of wheel throwing, the organic freedom of hand building, or the precise craft of functional ceramics, understanding these fundamentals will give you the confidence and skills to express your unique artistic vision in clay.
Professional Pottery Demonstration

Watch master potter techniques demonstrated by professionals. This video showcases the fundamental skills we'll cover in this guide, providing visual context for the techniques Ria Harman and our team teach in our workshops.
Understanding Clay Types and Properties
Before diving into techniques, it's essential to understand your medium. Clay is a natural material with unique properties that vary significantly between different types. According to Pottery Crafters, choosing the right clay type is crucial for project success.
Primary Clay Types
- Earthenware Clay: Low-fire clay (cone 04-06) that remains porous after firing. Ideal for decorative pieces and planters. Ria Harman recommends this for beginners due to its forgiving nature.
- Stoneware Clay: Mid to high-fire clay (cone 5-10) that becomes vitreous and durable. Perfect for functional pottery like bowls, mugs, and dinnerware.
- Porcelain Clay: High-fire clay known for its translucency and strength. Challenging to work with but produces the finest results for artistic pieces.
- Sculpture Clay: High-grog content clay designed for large forms and sculptural work. Excellent for hand building techniques.
Essential Pottery Tools and Equipment
Quality tools make the pottery process more enjoyable and your results more professional. As recommended by the Ceramic Arts Daily, start with essential tools and build your collection as your skills develop.
Wheel Throwing Tools
- Wire tool for cutting clay from wheel
- Metal and rubber ribs for shaping
- Calipers for measuring consistency
- Needle tool for trimming and detail work
Hand Building Tools
- Rolling pin for slab construction
- Wooden modeling tools for shaping
- Loop tools for carving and hollowing
- Sponges for smoothing and moisture control
Clay Preparation and Wedging Techniques
Proper clay preparation is the foundation of successful pottery. Ria Harman emphasizes that good wedging technique prevents air bubbles, ensures uniform consistency, and aligns clay particles for optimal throwing properties.
Spiral Wedging Technique
- 1Form clay into a cone shape with the point toward you
- 2Push down and forward with the heel of your hand, rocking the clay
- 3Rotate the clay 90 degrees and repeat the motion
- 4Continue for 15-20 repetitions until clay feels uniform
Professional Clay Wedging Demonstration

Master the essential skill of clay wedging with this professional demonstration. This technique, as taught by Ria Harman in our classes, is crucial for preparing clay for wheel throwing and hand building.
Mastering the Potter's Wheel
Wheel throwing is often considered the heart of pottery making. According to professional ceramicist Ria Harman, centering is the most critical skill to master, as it determines the success of every subsequent step.
The Five Stages of Wheel Throwing
1. Centering
Use firm, steady pressure to center the clay mass on the wheel head. This requires patience and consistent hand position.
2. Opening
Create the interior space using thumbs or fingers, maintaining wall thickness and form integrity.
3. Pulling Up
Gradually raise the walls using consistent pressure and support from both inside and outside hands.
4. Shaping
Form the desired vessel profile using ribs, hands, and tools while clay maintains plasticity.
5. Finishing
Clean up the form, compress the rim, and wire off the finished piece from the wheel head.
Hand Building Techniques
Hand building offers unlimited creative possibilities and is often more accessible to beginners. The Spruce Crafts identifies three primary hand building methods that form the foundation of ceramic sculpture and functional pottery.
Pinch Method
Start with a ball of clay and use thumb and fingers to gradually pinch walls thin and even.
- • Ideal for small bowls and cups
- • Develops hand sensitivity to clay
- • Most intuitive technique for beginners
Coil Method
Roll clay into coils and build up walls by joining coils together methodically.
- • Perfect for large vessels
- • Ancient technique still used today
- • Allows for complex organic shapes
Slab Method
Roll clay into flat sheets and join pieces to create geometric or architectural forms.
- • Excellent for boxes and tiles
- • Precise geometric possibilities
- • Foundation for architectural ceramics
Your Pottery Journey Forward
Mastering pottery fundamentals is a journey of patience, practice, and creative exploration. As Ria Harman reminds her students, every master potter started with the same basic techniques you've learned in this guide. The key is consistent practice and a willingness to embrace the learning process.
Remember that pottery is both a technical craft and an artistic expression. While these fundamentals provide the foundation, your unique artistic voice will develop through experimentation, practice, and personal exploration of the medium.
Ready to Put Theory into Practice?
Join our hands-on pottery workshops where Ria Harman and our expert team provide personalized guidance and professional instruction.